
Do you have too many duplicate files on a mac? You don’t know what to do and how to delete them.
Don’t worry.
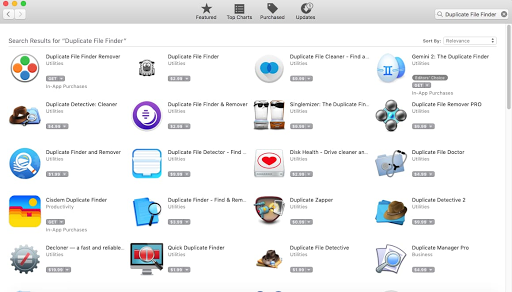
We have tested 14 duplicate files finder software and found an interesting result for free to use software you will surely love to download.
Note: If you love to watch videos instead of reading, then the video is given at the end of the post.
FAQ: How to delete duplicate files mac?
It all depends on how many duplicate files are in your drive or Folder. If you have a lot of duplicate files, then we suggest that you should use the software, and if you do not have a large number of duplicate files, then you can manually delete them.
When we were searching for the apps on the App store, we come to know that it’s tough to find any free app on the App Store.
If you think the free apps have to be on the App Store and it’s OK to show the advertisement on the Mac App, then do let us know in the comment section.
So, that Mac OS app developers understand your approach and develop free apps for Mac users.
Before we start talking about the software, I think most of you know that you can not install the software from an external source.
All software we run and install on our PC. Have to be from the App Store.
So, the first step we have to take. Is to allow the software to be download from an external source.
1. Allow App Download on Mac PC.
- Click on Apple icon ( top left side)
- Click on “System Preferences.”

- Now search for “Security & Privacy.”

- Click on the “Lock” to make changes and type the password of your PC.

- Now select “App Store and identified developers.”
2. DupeGuru ( Easy & Free to Use).
DupeGuru is free to use duplicate file finder for a widely used operating system like Windows, Mac, Ubuntu, and Linux.

In DupeGuru, you get three options Standard, music, and picture.
In Standard, you get three types of scan type- Filename, content, and folders.

You can keep the content selected and add the folder with the use of the plus icon.
Click on the plus icon; it opens up the window to select the folder you have all the duplicated files.

Select the folder and click on open to add that folder to be scanned. Now click on Scan.
One’s the software completes the scan, you get the Results window.

In the Result page of DupeGuru, you get four tabs: Details, Dupes Only, Delta, and View.

If you want to see the details, then you have to click on the particular file; otherwise, it’s not going to show you any detail.

Select the file by clicking on it and click on the Details tab. Now you get the details of the file.
The next option we have is Dupes Only, which means only duplicate files.
Here you get all the duplicate files listed. As you want to delete all the duplicate files, click on edit on the very top next to the files and select Mark All.
After selecting all the duplicate files, click on the gear icon and select “Remove Marked from Results.”

The next option we have is Delta, and it does not seem to be very useful, but if you are thinking of scanning the whole drive like C drive, D drive, or external hard drive, then it can be handy to know which folder file you are deleting.

Next, we have view the eye icon. If you are not sure about the file you are deleting from your drive, then click on the “eye” icon to view the file.

There are lots of other options you can find on the top bar like File, Edit, Actions, Columns, Mode, widow. You can experiment by yourself by clicking on it.
3. Duplicate Manager Lite.
The duplicate manager is one of the best free duplicate file finder app. There is a duplicated manger pro as well; however, we got our hand on free Duplicate Manager software.

It an easy to use software as it can scan and clean more than 1 million files within six minutes.
If you are looking to scan your hard drive, then it’s per-installed in the software.

It makes it easy for you to scan your PC Hard drive as it’s one click away to scan and delete the duplicate files.
You get three main options when you open the software: Remove duplicates, Auto Select, and Scanning.

a) Remove Duplicates.
In remove Duplicates, you get two options move deleted duplicates to Trash and Create an alias in the place of removed duplicates.

If you keep the first option check, then all the duplicate files go into your Mac PC trash folder.
The second option you have is create an alias and I don’t think it’s very useful neither I really want to test it…Hahaha.
b) Auto select.
Now the next we have is the auto select.

Set on what basis the application will choose the original.
It will be the newest file, or it will be the oldest file or will choose the original file by Folder priority.
We recommend using this mode when you scan multiple folders. You should set the folder priority before starting the scan.
Also, you can define to keep one original for all folders or each scan folders.
Exclude list for Auto Select option lets you exclude folder to be selected when you are deleting duplicate files.
c) Scanning.

To Speed up the Scan process, set the minimum file size to scan at the same as 200 KB.
Exclude List for Scan, let you exclude the file or folder.
Scan package type as file, determine which packages will be scanned as a folder.
Comparison Mode helps to search the identical files—the Files which hold the same content.
By using the comparison Mode, you can search a file with the same names & modification date or all the files greater than the selected size.
Now, As we know about all the settings, we should have to add a folder or drive to be scanned.
You have two sections here on the left side and the main one.
Left Side Section: Click on the add button if you want to add the drive to be scanned thoroughly.

Main Section: Click on the add button if you want to add a selective folder to be scanned thoroughly.

Now, as we have added the folder or drive, click on the scan.
The scan shows you the result page.

On the top section of the software, you get All files, images, video, music, documents, apps, archives, and others.
After the scan, all the related files show up in their sections as per the file format.
If you want to view the file, then select the file and click on the eye icon.
If you want to delete all the copied files, then click on Auto Select[Data] and click on Remove Selected.

d) The Con of the software.
It does not allow you to delete all duplicates files at once. It’s good software; however, it’s not as good as the DupeGuru.
If you thing showing advertisement instead of asking money to buy the pro version is okay with you, then do let us know in the comment section and do share this post with your friends so that they can share their valuable opinion.
4. Duplicates Finder.

Duplicate Finder is another easy to use application, but the problem is the same. You can not delete all duplicate files at once.
However, there is no pro version of this application to select all duplicate files, but I hope developer will add this option.
Now let talk about how you can use duplicate finder software.
It’s very easy to use application as you just need to click on the plus icon – Drag folders or Browser, and you can add the folder to be scanned.

Once you add the folder, click on “Find Duplicates Now” Button, and it starts the scan.

After adding the folders, you get the gear icon/ configure option to customize your scan.
These options let you narrow down the search results. Selecting search file types to improve scan performance.

In select files type, you get two options: Search for all file types and Search for these file types only.
You can select the options as per your requirement and click “Next.”
When you click Next, you get the screen to customize the file size range. It’s like ignoring the files smaller than your selected size and larger than your selected file size.

And you can set a date if you do not want the latest file, oldest file, or newest file to be scanned.
After customizing the options, click Next, and you get the option to customize a particular file(or group of files) to be searched.

After setting up the software as per your requirement, click on “Find Duplicates Now” Button. You get the result page, select the file, and click on “Remove Selected.”
5. Duplicate File Finder.
Duplicate file finder is another easy to use software.
When we were testing this software, we tested four times, and we did not see any problem using this software.
Even it deleted the files without asking to upgrade the application to a pro version.
You might see a problem in deleting the duplicate files if your drive has a lot of duplicates files.
Eventually, we are not sure about it, but we think you might get a problem when you delete a large number of duplicate files.
Now let’s talk about the software. What are the options you get when you use the software?

- Click on the plus icon, or you can drag to add the folder or drive to scan.

- If you want to add more folder, click on the plus icon.
- If you want to delete any of the folders or drive, then take your cursor on that folder, and you get the option to click on the minus button to remove it.

- After adding the drive or folder, click on the “Scan” button to scan the duplicate files.
- Now you get a Chart about the file types you have on your drive.

- You can change the Pie Chart to Bar Chart.

- Now on the top row of the software, you get some options.
- You can click on “Duplicate Files” to see all the duplicate or duplicate folders, Similar Photos, Similar Folder, etc.
- You can test this by your self as you may have a large number of duplicate files.
- For Now, Click on Duplicate Files.
- Once you click on the Duplicate files tab, you get all the files listed on the left side, sort by file size, and on the right side, you see two boxes; the first one to view the file and the second one shows original and the duplicate.

- To Delete the files at once, click on Auto Select and Click on Review and Remove.

- Now you get the confirmation page to leave it selected or to un-select duplicate files.

6. Disk Xray Lite.

Disk Xray lite is another duplicate file finder software. You can use it for free if your files are less than 500 MB.
It offers free duplicate file cleaning if your folder does not contain files of more than 500 MB. Eventually, it can be done if you are looking to delete duplicate photos.
When you install and open the software, you get the screen give in the picture below.

Click on “Start,” and it opens up the software screen to use it.

You can test this software by yourself as I did not find it very useful because when we ran this software to scan the folder.
It gave us accurate information on the video file and mp3 file but did not respond well to the pictures.
How to use Disk Xray Lite?
On the Location file icon and add the drive or folder. Click on Scan to check the file size, and after scanning, click on the Duplicate button to scan it.
Click on the triangle arrow pointing toward the right and start the Duplicate Scan.

After scanning, click on Action(wheel/gear icon) and click on Smart select, and next to it, you get the delete option. Click on delete to remove the duplicate files.
7. Dolly Lite: The Duplicate Finder.

The Dolly Lite is another easy to use software to delete duplicate files, but the free options allow you to remove 20 groups of files only.
If you want to delete more files than 20 files, then you have to buy it, or else you create a new folder. Copy the 40 files and past it to the new folder and scan it.
20 Groups mean 20 original and 20 duplicate files.
Now let’s talk about how to use it.
Click on Plus icon, Drop, or Add Folders.
Now you get a drop-down option to add the folder or drive.
I suggest not to add any drive in the software. Instead of that, add a new folder, as I suggested before.
Once you add the drive or folder, it starts the scan within a minute. After completing the scan, it shows you the duplicate file given in the picture below.

Click on smart select and clean to remove all the files.
![]()
8. Disk Drill.
Please read the Note before installing the software.
Disk Drill is a data recovery application that allows you to recover the data and remove duplicate files.
We haven’t tested the disk drill software as much for data recovery, but we have used it once or twice, and according to that, it seems to work well.
Anyways let’s talk about how duplicate file remover works.
I hope you know about how to install this software on your PC as it’s not available on App Store.
We have mentioned everything in step 1. Please read step 1, if you don’t know how to install an external app on mac PC.
When you download this software, it shows you the screen to buy the software, but it’s not mandatory to buy the software to use it.

- Click on “Start with disk drill basic.”

- Now you get the screen to choose the option.
- Click on the “Find Duplicates” that you find on the top side of the software.
- Now it shows to add the folder.

- Click on Add Folder and add your folder.
- After adding the folder, click on Scan.
- Now you get the result page.

- On top of the software, you have four select option.

- Auto: Select the duplicate files automatically.
- Newest: Select the Newest duplicate file added to the drive or folder.
- None: This option un-select all.
- After selecting the duplicate file, click on Remove to delete all the duplicate files.
